Showing posts with label Baked. Show all posts

Sunday, April 15, 2012

Pink Lady Cake, Bunnified


Living so close to an amazing city like New York certainly requires a bit of a lifestyle change when adjusting from a car-centric, more suburban existence.  In theory, you are in no better place in the world to be for shopping, dining, and culture.  In practice, you're SOL if you want to make a quick trip to a large one-stop shop to stock up on toiletries, home goods, or pantry staples, spend less than $20, and be able to schlep everything home without your arms falling off (I'm getting increasingly close to picking up one of these Nana carts - it's only a matter of time).  And with our tiny city apartments, stocking up to any significant degree is unwise.  The result of this is a lifestyle where you're more inclined to support small local businesses and shop sustainably for as little as possible.

On a day-to-day basis this is obviously a positive thing, however, this means that the infrequent trips to big box stores are marked by an excitement and desperation more typical of, say, running of the brides.  Wanting to take advantage of the key trifecta of car access, the spacious shopping experience, and the perhaps false impression that I'm getting a good deal, I've been known to impulse purchase my way to owning a fog machine, a full kg of guava paste, and a ruffled dress from Avril Lavigne's clothing line.  No, I do not have any business wearing anything with ruffles, or anything produced by the same person responsible for this.

For the first time ever, though, one of these impulse purchases has truly improved my life instead of just cluttering up my closet and inducing guilt.  A $10 investment in a Wilton starter cupcake-decorating set that I picked up at Target awhile back has infused me with a confidence for baking that is starkly disproportionate to my actual experience or abilities.

My cookie career spans almost two decades at this point, but there is something about the high stakes world of cakery that has always made me hesitant to dive in.  If you overshoot your baking time with a batch of cookies, you still have a 75% chance of fixing the problem and having an edible product at the end of your efforts, but cakes!  There are just so many ways for it all to go horribly wrong, as I have personally demonstrated for you at least twice.

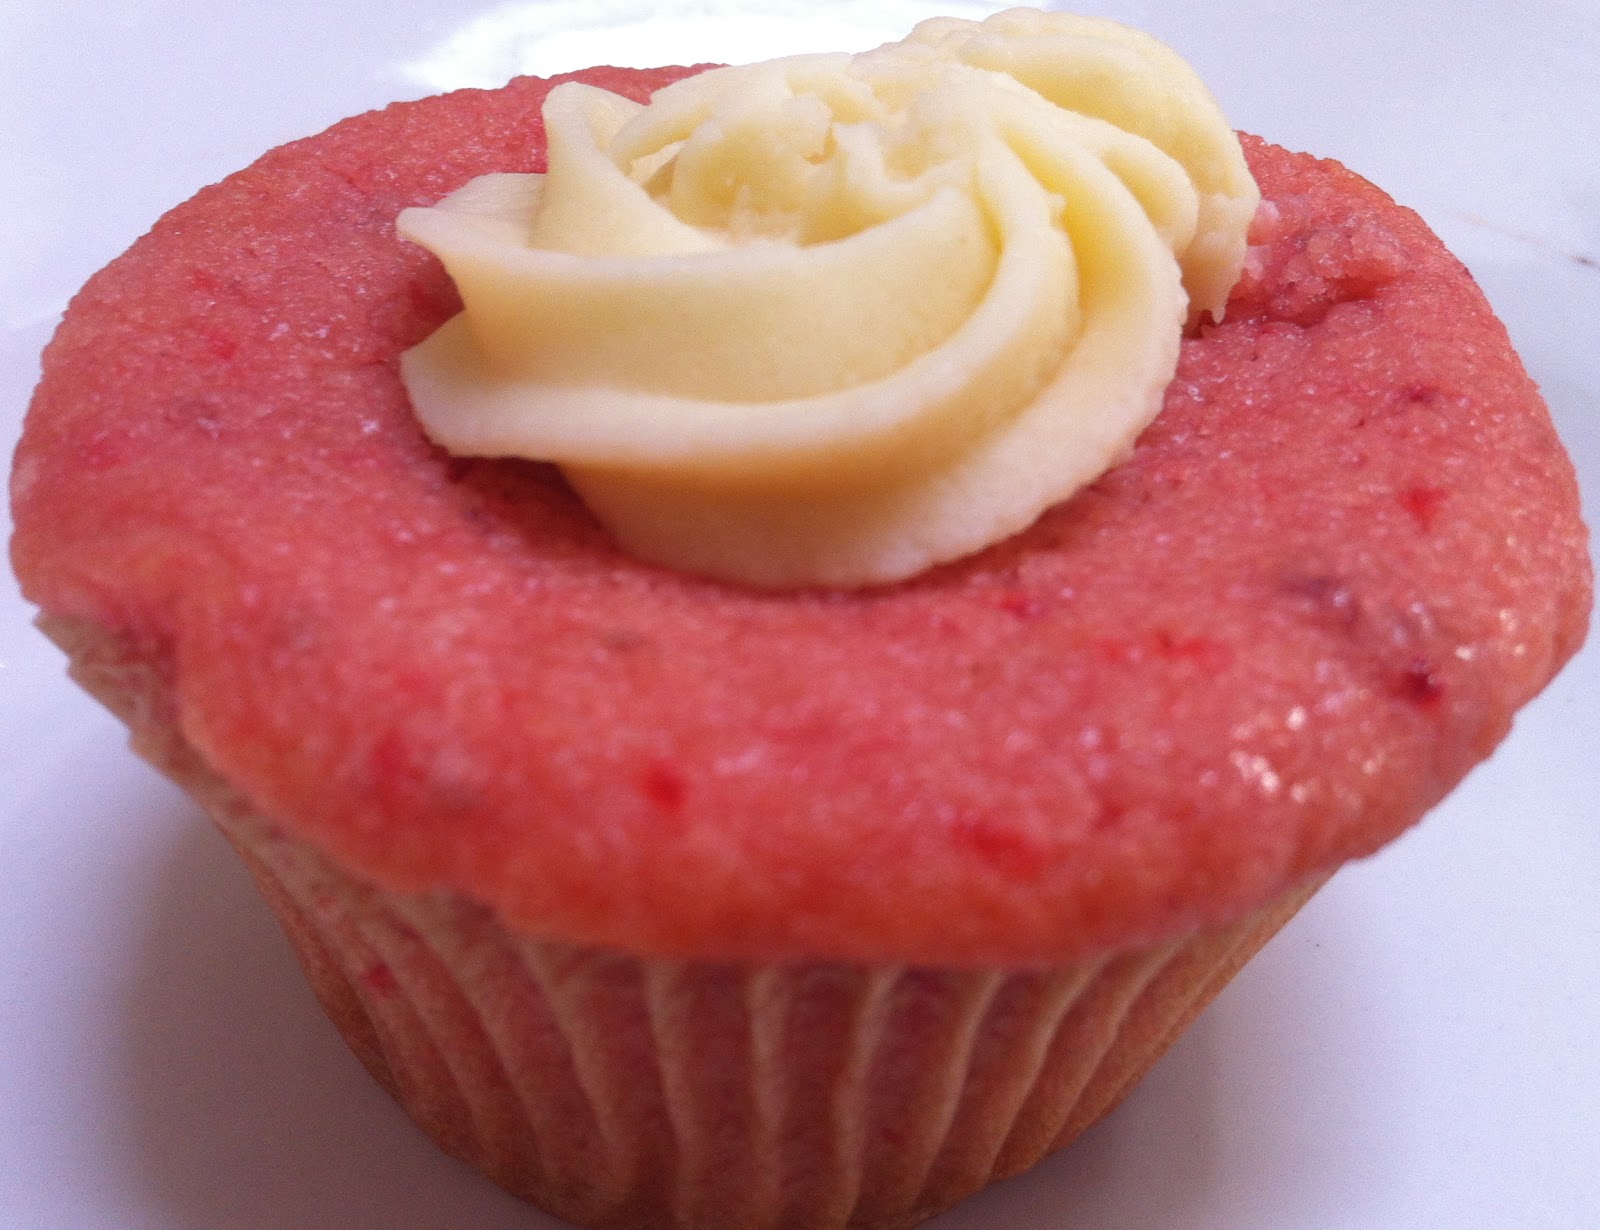
So I'm trying to remedy this situation now, and in the process become a more popular friend, family member, and coworker who can be relied upon for a celebratory showstopper if the occasion calls for it.  This Pink Lady Cake is a great starting point; a subtle fruit flavor and glorious girly pink with a recipe that is nearly impossible to mess up.  Of the two cake iterations that I've tried in the past few weeks, I like my adaptations below much better than the original Smitten Kitchen recipe that I used for cupcakes.  Separating out the liquid/dry ingredients until the last minute makes for a much lighter cake that is also easier to mix.

The only other advice I would impart is to make sure your butter, strawberries, milk, AND egg whites are at room temperature, otherwise the butter will chunk up and leave some steam holes in the final cake.  Fortunately, covering the entire cake in a tangy cream cheese frosting and shaping it into an Easter rabbit can make up for a lot.


Pink Lady Cake
Adapted from Smitten Kitchen


Serves 8-10
Total time: 75 min plus cooling and decorating time (Active time: 45 min)
  • 1/2 pound (230g) unsalted butter, softened*
  • 2 cups (400g) sugar  
  • 1 cup (240mL) pureed strawberries (fresh or frozen and thawed), about one box 
  • 5 egg whites at room temperature (about 1 cup [240mL] if you use the boxed stuff)
  • 1/2 cup (120mL) milk
  • 1-2 drops red food coloring (optional)
  • 3 cups (115g) cake flour (see here to make your own using AP, corn starch, and a little legwork)
  • 3 1/2 teaspoons baking powder
  • 1/2 teaspoon salt
  • 2 (8 ounce) packages cream cheese, softened*
  • 1/4 pound unsalted butter (115g), softened* 
  • 2 cups (200g) sifted confectioners’ sugar
  • 2 teaspoons vanilla extract
  • assorted things for decorating (e.g. shredded coconut, food coloring, chocolate chips, jelly beans, strawberries, julienned carrots, twizzlers, m&ms... the possibilities are endless)
For the cake:  Preheat oven to 350F (180C).  Butter two 9" rounds, parchment paper, and butter the paper.**  Cream butter and sugar with electric mixer on low speed for a few minutes.  Add strawberry puree, egg whites, milk, and food coloring, mixing well after each addition.

In a separate bowl, combine cake flour, baking powder, and salt.  Add the dry ingredients to the wet bowl in three additions, mixing until just combined.  Divide the batter into the two prepared pans.  Bake for 30-35 minutes until a tester inserted in the center comes out clean.

Cool for 10-15 minutes in the pans.  Invert onto wire racks and peel off paper liners.  Cool completely before frosting and assembling cake.

For the frosting and bunnification process:  mix cream cheese and butter with an electric mixer until well-combined.  Add vanilla and gradually blend in powdered sugar.  Set about 1/4 aside if you want to add a few drops of food coloring for decorating.  Keep in the fridge until ready to use (it is much easier to work with after being chilled for 30-60 minutes). 

Arrange one of your cake rounds in the center of a large pan.  Carefully cut out the ears (the sides of the second round) from the bow-tie (the center).  You may have to make further adjustments to make it look symmetrical; this means more cake for you to snack on.  Arrange your ears and bow-tie, and cover the entire thing in cream cheese frosting.  I won't infringe upon your personal creativity, so you should decorate this however you want.  But do take a note from some of the more frightening examples out there.

* Successful, mildly healthier substitutions I have tried:  swap half of the butter (in the cake and frosting) for a light cholesterol-free veg oil spread, and use reduced fat cream cheese for the frosting.  You cannot tell the difference.  Now, if there was only some way to get the sugar down..


**I tried to cut corners here and not use the parchment paper, and was left with a good amount of cake stuck in the pan.  Do not cut corners.  Alternately, you could make cupcakes which take about 20 minutes in the oven, give or take.

Friday, December 30, 2011

Dead Easy Coconut Macaroons

These three-ingredient cookies are the easiest in my repertoire and come together in under two minutes for all of your late night "wait, the holiday party is tomorrow?" moments. With one important caveat:  do NOT attempt these without lining your cookie sheets with parchment paper.  I've got many memories from days of yore pre-parchment proliferation, and my poor mother chiseling caramel-colored pools of cemented condensed milk off of her baking sheets, only to find the dog had eaten the several dozen fruits of her labor by the next afternoon.  Don't let this happen to you.

The sweetened condensed milk in this recipe also gives the coconut a toasted nutty flavor, while still keeping the cookies sweet and chewy.  So it's not "all-natural" (what does that mean, anyway?), but you won't have to whip egg whites which I consider a procedural win.  Use non-stick paper, train your dog better, and enjoy.


Quick and Easy Coconut Macaroons
Recipe from my Mom

Makes 4-5 dozen cookies
Total time: one hour (Active time <5 minutes)
  • 16oz (450g) grated coconut (sweetened or unsweetened)
  • 14oz (400g) sweetened condensed milk 
  • 2 teaspoons almond extract (or vanilla in a pinch)
Preheat oven to 350F (180C).  Add all ingredients to a bowl and stir until well-mixed.  Drop by teaspoonfuls onto greased parchment paper-lined baking sheets.  Bake for 10-12 minutes, until lightly browned.

Move the parchment paper onto a wire rack to cool.  Store on waxed paper in airtight containers, or freeze.  Good for several weeks, if they last that long.

Friday, May 13, 2011

White Chocolate Almond Biscotti


 95% of the time when I make a batch of cookies, I subtract at least two minutes from the suggested baking time.  Why?  Soft, chewy, gooey, and delicious cookies are almost always way better than the careful-don't-crack-your-teeth kind that I always associate with interminable meetings, eating them just because they're there.  I've also found that the crunching action and associated crumb clean-up helps you stay awake in the mid-afternoon slump.  But an enjoyable cookie eating experience it is not.

And until recently I thought that biscotti, crunchy by definition, also fell into this undesirable category.  What I didn't consider, however, is the hot-beverage-dunk/transformative-phase-change factor in which the biscotti become wonderfully soft, warm, and melt in your mouth after they are dunked in tea or coffee.  A similar hot-beverage-dunk/transformative-phase-change factor turned me onto plain donuts 20 years ago and I've never looked back (except for Boston cream of course).  Anyone remember when plain donuts used to be made with a bonus dunking handle?  Apparently this dates me.

Anyway, the genius of biscotti is two-fold: the oblong design ensures that the cookie exposed to moisture is limited to a bite size, and the double baking process ensures that it doesn't immediately suffer from the inedible mushiness that befalls your average vanilla wafer.

So I have a new appreciation for biscotti.  They probably won't surpass my favorites, but they certainly have a place at 3pm with a cuppa. This recipe is only lightly sweet so you don't feel like it's too much of an indulgence.  They're also gorgeous with a white chocolate drizzle, last for weeks in an airtight container, and make a great gift for all the moms in your life when paired with chai concentrate.  It's really giving the gift of an afternoon break and relaxation, which is basically the same as a spa gift certificate without the associated cost or anxiety.


White Chocolate Almond Biscotti
Adapted from Allrecipes.com

Makes 24-30 cookies
Total time: 2 hours (Active time 30 minutes)

  •  1/4 cup (55g) unsalted butter, softened
  • 3/4 cup (170g) sugar
  • 2 tablespoons orange zest (from about 1 1/2 large oranges)
  • 2 teaspoons (10mL) vanilla extract
  • 2 eggs
  • 1 egg white
  • 2 cups (250g) all-purpose flour
  • 1 1/2 teaspoons baking powder
  • 1/4 teaspoon salt
  • 4 oz (110g) white chocolate, chopped and divided (about 1/2 c of chips)
  • 1/2 cup (80g) dried cranberries or raisins
  • 1 1/4 cups (140g) slivered almonds, toasted

Beat together butter, sugar, orange zest, and vanilla extract until light and fluffy.  Add eggs and egg white one at a time, mixing well after each addition.

In a separate bowl, whisk together flour, baking powder, and salt, then gradually add the dry to the wet mixture.  Stir in 3/4 of the white chocolate, dried cranberries/raisins, and slivered almonds.  Cover and chill in the fridge until the dough is solid enough to handle (30-60 minutes).

Pre-heat oven to 325F/165C and line a baking sheet with parchment paper.  Divide dough in two and form each half into a log roughly 3 x 12" (8 x 30cm) and arrange them on the parchment with at least one log's space between the two.  Bake for 20-25 minutes until golden and cool on baking sheet for 10-15 minutes, or until cool enough to handle.

Cut the baked logs crosswise on a diagonal into roughly 1"/2cm slices (you should have about 12 per log) using with a serrated knife in a smooth downward motion to avoid crumbling.  Arrange slices evenly back on the baking sheet and bake for another 15 minutes until golden(er).  Transfer to wire racks and cool completely.

Optional (but looks really cool) white chocolate drizzle:  Melt the remaining 1oz of white chocolate in a double boiler (or microwave) until smooth.  Use a fork to quickly drizzle the chocolate back and forth over the biscotti until evenly covered.  Let stand at room temperature until cool.

Wednesday, May 4, 2011

The Kale Thing, and My Most Requested Recipe


One of the alternate blog names that I tossed around was Kale, Et cetera.  It was under serious consideration until the last minute when I decided that I would be too confused by the double "e" in the web address.

But Kale, Et cetera would have been more than appropriate since it is the one single produce item that I always buy and have on hand.  Love love kale.  It's incredibly tasty, high in fiber and vitamins, and I try to work it into every meal I can.  And unlike spinach and chard which have higher water contents, it stands up well to cooking AND works great raw in a salad.

Behold my go-to potluck dish.  Somehow, despite its lack of chocolate and bacon, I get more requests for this recipe than anything else.  Now, I prefer a potluck meal to a catered one any day of the week since I love seeing what people come up with as a reflection of their personality and background.  However, a disorganized free-for-all potluck lunch will, if unchecked, lead to 90% slow cooked meat dishes and extreme cakes.  Because of this, kale salad has become my go-to dish of choice to add a healthier alternative to the mix.  And in such situations it usually becomes a base for a fantastic trash salad featuring 5 of more different types of meat, if I'm lucky.

Augmented with ricotta, a chicken leg, and leftover moussaka.

You can use any type of kale you can find for this salad.  Tuscan/lacinato/dinosaur kale (the flat-leaf kind) has the nicest texture right off the bat, but it's often tough to find; the curly kind tastes just as good and softens right up if you let it sit dressed for 30 minutes so before serving.  The croutons are a personal touch since I'm always looking for ways to use up stale bread, and when is buttery crunchiness ever a bad thing?  Rounded out with dried fruit, this is delicious, easy, and hits all the bases.


Kale Salad
Adapted from Melissa Clark

Makes one big salad (which is anywhere from 2-8 servings depending how hungry I am)
Total time: 5-10 minutes (+15-20 for the croutons)
  • 1 bunch of kale
  • 3 tablespoons olive oil
  • zest and juice of one lemon (or two limes)
  • 2 teaspoons Dijon mustard
  • 1/2 clove of garlic, grated or finely minced
  • salt and pepper
  • 1/4 cup (1oz/30g) freshly grated hard cheese (parmesean, pecorino, or whatever is on sale)
  • big handful of dried cranberries, currants, or raisins (optional)
  • big handful of homemade croutons (optional, recipe below)

Rinse and dry kale well.  Remove tough center ribs, slice leaves into very thin ribbons, and place in a large bowl.

Combine olive oil, lemon juice and zest, mustard, garlic, and salt and pepper in a small jar and shake well.  Toss salad with dressing and cheese (it will keep for a few days in the fridge like this).

Top with cranberries and croutons when ready to serve.

Homemade Croutons

Makes 5-6 cups (okay this is a lot, enough for 10-15 salads, but they keep well in an airtight container)
Total time: 15-20 minutes (Active time 5 minutes)

  • 8oz (225g) stale bread (whatever kind you have, about 1/2 a baguette or 8ish slices)
  • 3 tablespoons melted butter
  • 3 tablespoons olive oil
  • 1-2 tablespoons Dijon mustard
  • 1 clove garlic, grated
  • 1 teaspoon dried thyme
  • salt and pepper to taste
  • 1/4 cup (1oz/30g) freshly grated hard cheese (parmesean, pecorino, or whatever is on sale) 

Preheat oven to 400F/200C.

Rip or slice bread into small cubes whatever size you like and place in a large bowl.  Mix butter, olive oil, mustard, garlic, and thyme in a small bowl and drizzle on the bread until evenly coated. 

Spread the mixture out in a single layer on a parchment-lined cookie sheet and sprinkle on salt, pepper, and grated cheese to taste, adding a drizzle of olive oil if it looks dry.  Bake for 10-15 minutes until brown and crispy.  Store in an airtight container when cool.

Thursday, April 28, 2011

Lemon Blueberry and Ricotta Scones with Lemon Curd


This is in no way inspired by the royal wedding hooplah whatsoever.

It's totally normal to think about making scones for the first time in years on a random Thursday night so you'll have them for breakfast on a random Friday morning with or without a cup of tea or Pimms.

Right?  Right.  No matter, these are fantastic and look gorgeous.  And lemon curd?  Not nearly as hard as I would have thought.  Only five minutes of stove-tending creates a deliciously tart scone topping that would go great with some clotted cream if, for whatever reason, you do decide to go all out for a random Friday morning celebration.


Lemon, Blueberry, and Ricotta Scones
Adapted from my favorite on Allrecipes.com


Makes 16 small scones
Total time: 35-45 minutes (Active time 15-20 minutes)

  • 2 cups (250g) all-purpose flour
  • 1/3 cup (75g) sugar
  • 1 teaspoon baking powder
  • 1/4 teaspoon baking soda
  • 1/2 teaspoon salt
  • zest of one lemon (two teaspoons)
  • 1/2 cup (115g) unsalted butter, frozen
  • 1/2 cup (75g) fresh or frozen blueberries
  • 2/3 cup (160g) fresh ricotta
  • 1 egg

Preheat oven to 400F/200C.  Mix flour, sugar, baking powder, baking soda, salt, and lemon zest in a large bowl.  Grate butter on the large holes of a box grater and work in with your hands (or to make this step immensely easier, cut the frozen butter into chunks and combine with dry ingredients with a food processor).  Mix in blueberries.

In a small bowl, mix ricotta and egg until smooth and add to the rest of the ingredients in the large bowl.  Stir until large dough clumps form.  When most of the dough has clumped, turn it out on a floured surface and work into one large ball.  Pat into an evenish rectangle about 3/4" thick.  Cut into 8 smaller rectangles, then cut each on the diagonal to form 16 triangles and sprinkle with 1 teaspoon sugar.

Transfer triangles to a baking sheet lined with parchment paper and place about 1" apart.  Bake 10-15 minutes until golden.


Lemon Curd
Adapted from Baking Bites


Makes ~1/2 cup
Total time: 10 minutes (Active time 5-6 minutes)

  • juice of two lemons (about 1/3 cup/80mL)
  • zest of one lemon (about 2 teaspoons)
  • 1/3 cup (75g) sugar
  • 1 egg
  • 1 tablespoon unsalted butter 

In a small sauce pan, combine sugar, lemon juice, and zest over medium heat.  Remove from heat once the sugar is dissolved.

Beat the egg in a medium bowl and add the lemon-sugar syrup in a slow drizzle (this should take at least a minute or two), whisking constantly until well combined.

Pour back in the saucepan and add the butter.  Cook over low heat until the curd is thick (about 5 minutes), stirring constantly.  Store in an airtight container in the fridge when cool.

Friday, March 25, 2011

Tale of Two Cake Fails

Yes, I contributed to this.

As a foil to the savory sausage rolls that were served up for St. Patty's Day, I also baked close to 100 mini green velvet cupcakes.  The recipe I used is that of the lovely Janelle of Jaay's Thrilling Sweets. She spearheads a custom-order mobile bakery and is somehow able to whip up specialty cakes in a toaster oven and save the world from environmental disasters in the same day. 

These cupcakes tasted fantastic, all were eaten, and I typically didn't take any pictures.  But I think that is probably just as well since I tried to cheap out and use several-years-old reconstituted primary color gel-based dye instead of real deal food coloring.  Evidently I had more yellow than blue and the result looked a bit like bile or Ecto Cooler and had to be heavily frosted to hide the evidence.

So the green velvet cake made the following weekend was more of an aesthetic pursuit from the get-go.  My friend Jill suggested a recipe which sounded great that she had found in a book I gave her for Christmas that brings together our shared love of cocktails and baked goods.  However, when she said "SoCo" I for some reason heard "Kahlua", and it was all downhill from there. 

Exerpt from the recipe headnotes:  Say “Southern Comfort” and most people will roll their eyes and groan, “SoCo. I haven’t had that since college.”  But I was optimistic, since I have fond memories of drinking the sweet whiskey mixed with organic berry juice out of a tumbler with a built-in straw.  It also stated that SoCo  "lends itself to baking, yielding a subtle hint of whiskey without overpowering the other flavors."  Optimistic.

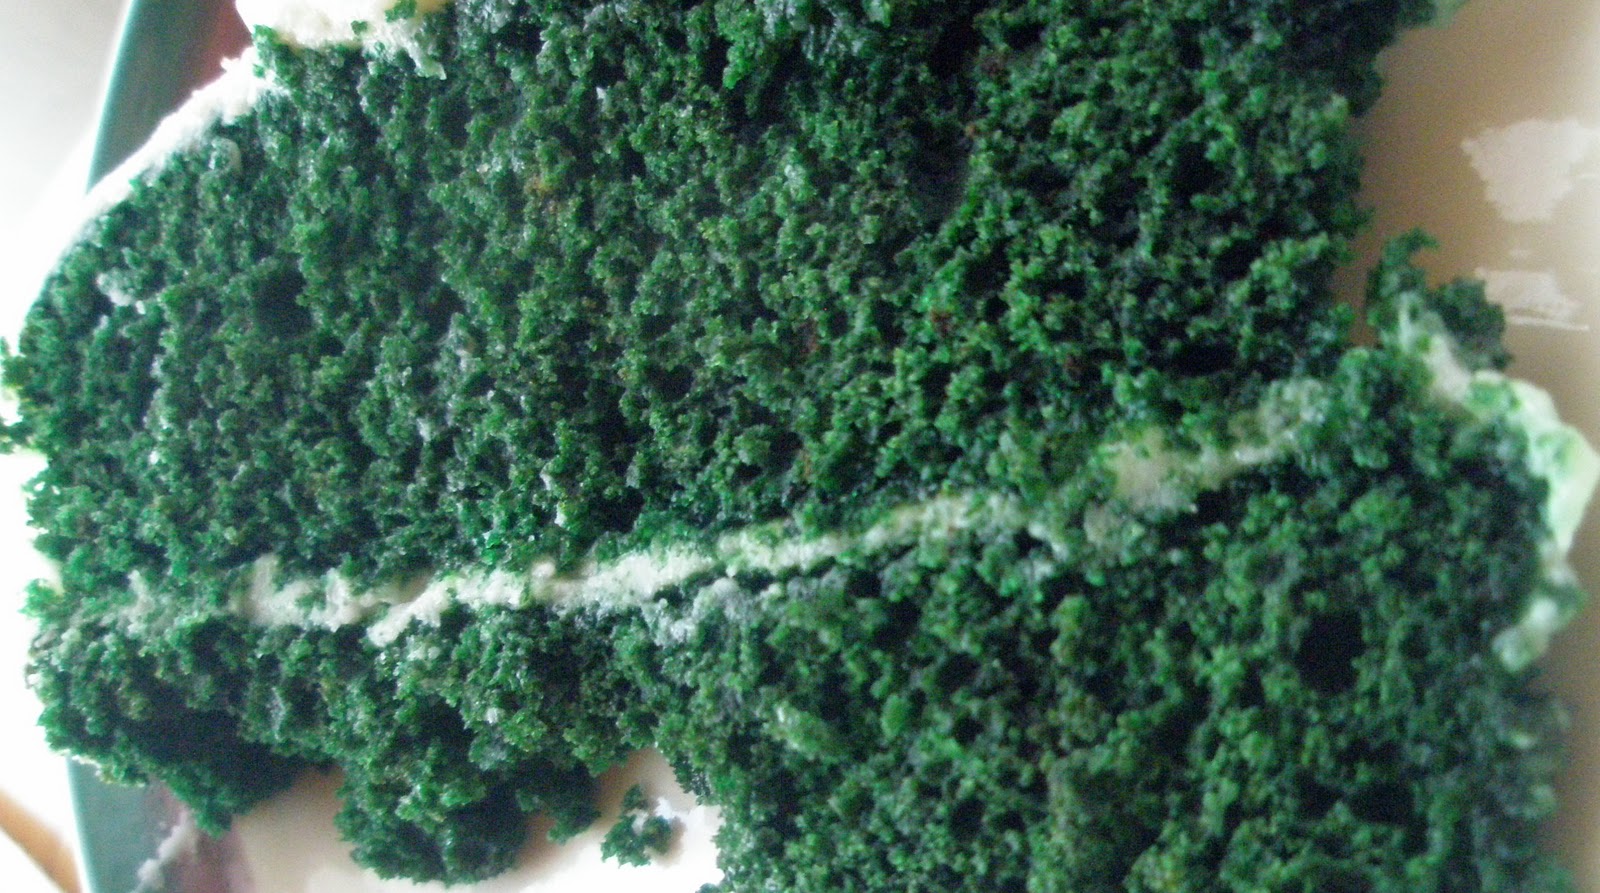
Now I will say that the cake part itself was gorgeous and had a really appealing deep shade of green (appealing if you like artificially colored things of course).  But the smell that gave me a gag when I first opened the mason jar Jill brought over pervaded the whole cake (and the house and my clothes the next day).  And instead of a subtle hint of SoCo, it in fact dominated the flavors of everything that I had eaten all week.

Problem number two was the cottage cheese-like frosting.  For the lumpy texture, I'll lay fault on myself for not being able to find the electric mixture.  But for the runniness and awful backwoods flavor I'm going to shift the blame onto a certain someone who decided that "when in doubt, add more booze" was a good rule to follow when baking.  Tsk tsk.

That being said, if you do follow the directions for the frosting correctly, and can actually enjoy the taste of SoCo without the buried traumatic memories of it that I evidently have, the cake's got a great texture to it and looks divine (and you can find the recipe on msn).

Instead and for posterity's sake, I'll leave you with Janelle's recipe which really is excellent and which you should also follow to a T and not stuff up by being cheap with the ingredients.  If you're not leaving the cupcakes outside all day, the cream cheese frosting would be delicious.  Otherwise you could do what I did and go the cooked route.


Green Velvet Cupcakes with Cream Cheese Frosting
Recipe from Janelle of Jaay's Thrilling Sweets

Makes about 30 cupcakes
Total time: ~60 minutes (Active time: 40 minutes)

For the cupcakes:
  • 2 1/4 cups (275g) all-purpose flour
  • 1 tablespoon unsweetened cocoa
  • 1/2 teaspoon salt
  • 1 1/2 teaspoons baking powder
  • 12 tablespoons (330g) unsalted butter, at room temperature
  • 1 1/2 cups (300g) sugar
  • 2 large eggs, plus 2 large egg yolks
  • 1 bottle (1 oz, 30mL) of green food coloring
  • 1 1/2 teaspoons vanilla extract
  • 1 1/4 cups (300mL) milk
For the frosting:
  • 6 oz (170g) cream cheese, at room temperature
  • 3 tablespoons (80g) unsalted butter, at room temperature
  • 1 1/2 teaspoons vanilla extract
  • 2 1/4 cups (260g) confectioners sugar

Cupcakes: Preheat oven to 350°F. Mix flour, cocoa, salt and baking powder. In a separate bowl, with an electric mixer, beat butter until creamy. Gradually add sugar and beat until light and fluffy. Add eggs, one a time, beating well after each addition. Beat in yolks, food coloring and vanilla. Alternate adding dry ingredients and milk, beginning and ending with dry ingredients. Beat just until all ingredients are incorporated.

Divide batter among cupcake liners. Bake until a toothpick inserted into center of a cupcake comes out clean, about 20 minutes. Cool in pans on wire rack for 10 minutes, then remove cupcakes from pans to rack to cool completely.

Frosting: Using an electric mixer on medium speed, beat cream cheese and butter until smooth. Beat in vanilla. Gradually add sugar and beat until easy to spread.

Tuesday, March 22, 2011

Apple Yogurt Spice Cake: An Excellent Frosting Delivery System


There are two types of people in the world:  those who love frosting, and those who love cake.  Perhaps a third type that I've only rarely encountered is the "just not that into sweets" person (never female), who isn't really worth discussing.  But frosting and cake lovers usually exist in equal proportions with a check/balance system perfectly tuned to yield no leftovers of either component.

I'm a long-time member of Camp Cake and am well-familiar with ritualistic frosting scraping at birthdays, but I do love a good lightly-sweetened whipped cream.  Unfortunately, cream icings don't hold up well to transportation, anything above room temperature, and definitely not entire days out in the sun.

But this one takes on the whipped cream texture excellently without any of the drama.  With a base of butter, regular sugar, and a thick cooked milk/flour mixture, it is only lightly sweet yet rich and creamy.  The perfect frosting for cake-lovers.

I made a full batch over a week ago based on a Pioneer Woman recipe, but it was way way too much for even 70-80 mini cupcakes (yes I was being skimpy because I hate too much frosting on cupcakes).  Instead of my first inclination (eating it with a spoon), I brought the second half to my parents' house and cobbled together a healthy-ish cake using a few different recipes to serve as a not-too-sweet, breakfast and dessert-appropriate frosting delivery system.

The cake itself is a great every day snack or brunch component, but not really a show-stopper until you add the frosting.  The next day it's even better when the cake becomes super moist and the spices really get a chance to develop.


Apple Yogurt Spice Cake

Makes one 9" (23cm) square cake
Total time: 50-70 min (Active time 20-30 min)

  • 1/4 cup (1/2 stick, 110g) unsalted butter, softened
  • 1 cup (220g) brown sugar
  • 3 large eggs
  • 1 teaspoon vanilla
  • 1 large apple, peeled and grated
  • 1/2 cup (115g) plain yogurt
  • splash of milk (maybe 2-3 tablespoons)
  • 1 cup (120g) all-purpose flour
  • 1 cup (120g) whole wheat flour
  • 1 1/2 teaspoons baking soda
  • 1/2 teaspoon salt
  • 1 1/2 teaspoons cinnamon
  • 1/2 teaspoon grated nutmeg
  • 1/2 teaspoon ground allspice
  • 1/2 teaspoon ground cloves
  • 3/4 cup (75g) dried cranberries or raisins

Pre-heat oven to 375F/190C.  Butter and flour an 9"/23cm square pan.

In a large bowl, cream together the butter and brown sugar.  Beat in eggs one at a time, then mix in the vanilla, yogurt, apple, and splash of milk and set aside.

In a medium bowl, whisk together the flours, baking soda, salt, and spices.  Add the dry ingredients to the bowl of wet ingredients and stir until just-mixed.  Pour into the prepared pan and bake at 375F/190C for 30-40 minutes, or until a cake tester/toothpick/piece of dry spaghetti comes out clean when inserted into the middle (check it starting at 25 minutes to be on the safe side).

Cool in the pan for 20 minutes, then tip out onto a cooling rack until room temperature and ready to frost.


Cooked Frosting
Adapted from The Pioneer Woman


Makes about 2 cups of frosting (enough for a single-layer cake and then some)
Total time: 35 minutes (Active time 20 minutes)

  • 2 1/2 tablespoons (20g) all-purpose flour
  • 1/2 cup (120mL) milk
  • 1 teaspoon vanilla
  • 1/2 cup (1 stick, 225g) unsalted butter, softened
  • 1/2 cup (100g) white granulated sugar

In a small saucepan, whisk flour and milk vigorously over medium heat until very very thick (once milk comes to a boil this happens very quickly).  Remove from the heat, stir in vanilla, and let cool to room temperature (this will take about 20 minutes or so, but you can put the pan into a bowl of ice to speed things along).
 
Cream butter and sugar until light and fluffy.  When the sugar is no longer grainy, add the cooled flour/milk/vanilla mixture and beat beat beat until it has a homogeneous texture of whipped cream (see here for great procedural photos).  This took about 2-3 minutes with an electric mixer on medium/high speed.

Frost cake as desired.  Revel in your success.

Tuesday, February 1, 2011

Mom's Banana Bread with Almond Streusel


My mom is one of the tiniest people and healthiest eaters I know, so she was never one for random mid-week baking when I was growing up.  Unless of course, there were bananas that were going off in which case we'd be treated to banana bread for breakfast, second breakfast, and lunch (as long as it would ever last).  I don't even remember eating bananas as a kid, so I suspect this is the only reason that she bought them in the first place (correct me if I'm wrong here, Mom).

Overripe bananas beget delicious baked treats.  Not groundbreaking territory here.  But in the realm of banana bread recipes, Mom's is one of the best and lowest in fat out there.  I realize using shortening is a bit of a faux pas these days, but if you read your labels it's pretty easy to find a brand that is trans-fat free.  I've experimented a lot with this and shortening really seems to give the bread better structure (or a tender crumb, as they say) than butter does while using less of it.  Even better, the recipe as written is one-bowl and one-step.


To compensate for this relative healthiness and ease, I added a good sprinkle of an almond streusel on top.  The struesel is optional, but I wouldn't skip it.  What isn't made better with a streusel topping?  Nothing.  While I love nuts on banana bread, I'm fundamentally opposed to nuts in it, but if you like a banana nut bread, feel free to add 1/2 cup of chopped nuts to the mixed dough.


Mom's Banana Bread with Almond Streusel

Makes one 9" x 5" loaf
Total time:  60-70 minutes (Active time 10-15 minutes)

  • 2 tablespoons shortening
  • 1 cup white sugar
  • 1 egg
  • 1 teaspoon vanilla extract
  • 3 overripe mashed bananas
  • 1 teaspoon baking soda dissolved in 1/4 cup water
  • 2 cups flour (I like 1/2 all-purpose and 1/2 whole wheat)
  • 1 teaspoon cinnamon
  • 1/2 teaspoon salt

Combine ingredients in order listed (shortening and sugar should be well combined before adding other ingredients and do not over-mix).  Pour mixture into greased and floured loaf pan.

  • 1 tablespoon cold unsalted butter
  • 2 tablespoons flour
  • 2 tablespoons brown sugar
  • 1/4 teaspoon cinnamon
  • 1/8 teaspoon salt
  • 2 tablespoons chopped or slivered almonds
  • whole nutmeg (optional)

Preheat the oven to 350F. Combine first 5 ingredients with your hands until the mixture resembles chunky sand.  Add almonds and sprinkle mixture over the top of unbaked banana bread.  Grate whole nutmeg over the top, if using.

Bake loaf at 350F for 45-60 minutes until a tester pulls out clean.  Cool for at least 15-20 minutes in the pan before cutting.