Showing posts with label Soup. Show all posts

Friday, February 3, 2012

Winter Veg and Grain Trash Soup


It's pretty rare that I reach for a recipe to cook from twice, especially something as adaptable and forgivable like soup.  A repeat of this Orangette vegetable soup was probably more due to curiosity than anything else - how could something so simple be so delicious?

Fortunately for you all, I'm a regular Poirot and deduced the secret in no time: good stock, fresh herbs, and cubed winter veg.  And by "fresh herbs," all I mean not the dried kind, since I'm still using up my mammoth bunches from Thanksgiving that are having some bronze age discoloration issues (but taste fine).  Otherwise, the recipe lends itself well to tinkering and veg-drawer cleaning, incorporating all of the bits and pieces lying around your fridge into a real snuggie of a stew that you actually want to eat, even though it's incredibly healthy.

So tinker to your heart's desire.  I originally made this with the proper leeks, parsnips, and cabbage, though the second version with turnips, butternut squash, and kale was a little more sweet and bitter. I probably wouldn't do all potatoes since it would be too starchy, but otherwise let your fridge contents be your guide.


Because this time of year we can all use a little redemption, can't we? I, for one, am still recovering from my second annual trip to the Beer, Bourbon, and Barbecue festival.  So stay tuned for lots more on the vegetable front.


Winter Veg and Grain Trash Soup
Inspired by Orangette


Serves 6-8
Total time: 45 min-90 min (Active time 10 minutes)


  • 2 tablespoons fat (olive/vegetable oil and butter are best)
  • 1 large onion, diced (any kind)
  • 3 or 4 ribs of celery, diced (OR the skinny core of the celery bunch, leaves included)
  • 3 skinny carrots, diced
  • 1(ish) pound (450 grams) mixed diced winter veggies, such as:
    • potatoes/sweet potatoes
    • parsnips, peeled
    • turnips/rutabagas
    • winter squash
    • leeks, the white/light green parts rinsed and thinly sliced
  • 3 large garlic cloves, minced
  • 1ish tablespoon fresh hard herbs (rosemary, sage, thyme, or a mix)
  • 1 ½ -2 liters (6-9 cups) low-sodium chicken or vegetable stock (veer towards the low end for a stew)
  • 2 bay leaves (optional)
  • Salt and pepper to taste
  • 1/4-3/4 cup (50-150g) uncooked grains such as (in order of cooking time): 
    • couscous
    • bulgur
    • small pasta
    • quinoa
    • white rice
    • pearled barley (best for chew)
    • farro
    • brown rice
    • wheat berries (will take at least an hour of extra cooking time)
  • Salt and pepper to taste
  • Few handfuls of shredded leaves such as:
    • savoy cabbage
    • brussels sprouts
    • kale
    • chard
    • spinach
  • To serve (optional): grated hard cheese, squirt of Sriracha

Heat the oil/butter in a large pot.  Add the onion, celery, carrots, and other winter veg, and stir to coat. Cook, stirring occasionally, for about 10-15 minutes, or until softened. Add the garlic, herbs, and a few pinches of salt, and cook for a few minutes more.

Add the stock bay leaves (if using) and bring to a boil, then lower to a simmer.  Stir in whatever grains you're using, and cook as long as indicated on the package (20 minutes for pearl barley [my favorite]), stirring occasionally. 

Finally add your shredded leaves, and simmer for 5 minutes more.   Taste, and add salt as needed. Serve with freshly ground black pepper, or gussy up with Sriracha and shredded cheese.

Monday, June 6, 2011

Repurposing Leftovers: Trash Noodle Soup


This dish was inspired by a lonely little container of rice noodles leftover from a Thai food order that I discovered in the fridge.  Noodles can sometimes be incorporated into stir fry situations if they're in good condition, but these were at least a week old and had congealed into a sort of stringy brick that would definitely not have held up to a frying pan.

The solution?  A brothy soup to rehydrate the noodles into an edible form, while delivering a delicious and healthy dinner.  This isn't really a recipe so much as a rough ratio of ingredients and flavoring suggestings since I don't think I've ever made this the same way twice.  And as I write it out, it's not unlike fried rice in it's basic components and adaptability.  The version pictured is miso/hot and sour flavored with tofu, cabbage, edamame, and some rehydrated black fungus I bought in Chinatown ages ago, though this dish certainly doesn't need to have asian flavors or ingredients if that's not what you have on hand.

Here are a few winning flavor combinations:
  • for bastardized minestrone: use 1 cup of white/kidney beans, 1/2 can of diced tomatoes in juice, a small chopped zucchini, fresh spinach, splash of red wine, oregano, basil, and finish with parmesean cheese
  • for simple, rustic, and healthy: sautee 1/2 a thinly sliced onion and 2 cloves of garlic before heating broth, use 1 cup of cooked chickpeas, a few handful of shredded green cabbage, and finish with a drizzle of tasty/expensive olive oil
  • for cheaters' thai: substitute half of the broth with a can of coconut milk, use shredded chicken or tofu chunks, mushrooms and red peppers, season with 1 teaspoon or so of green curry paste, fish sauce (start with 1/2 tablespoon), a lime wedge, and fresh cilantro
  • for quick and dirty pho: simmer broth with whole star anise and a cinnamon stick, serve hot broth over noodles and thinly sliced raw beef, and garnish with basil, mint, bean sprouts, and sriracha
  • for salty, hot, and sour (or the Chinatown special, a personal favorite): use rehydrated shiitake, black fungus, or seaweed, tofu chunks, frozen edamame pods, and green onions, seasoned with 2 tablespoons of miso paste mixed with an equal amount of warm water, a big squirt of Sriracha or other chile paste, and 1-2 tablespoons of vinegar

The only caveat I would add is do make this in small batches since it's best when eaten right away.  If it sits, the noodles keep absorbing more and more moisture until they completely disintegrate to turn your soup into a gelatinous mass of starch and veg.  Quick-cooking rice noodles are especially susceptible to this.  If you wanted to do a noodle soup lunch the next day, just keep the broth/meat/veg mixture separate and heat it with the noodles right before you eat it.  I know, I know, that makes two separate containers to wash and that's the worst.  But isn't it worth it for a (very nearly) free lunch?


Trash Noodle Soup

Serves 2-4
Total time: <10 minutes
  • 4 cups (1L) low-sodium stock or broth
  • 1 cup quick-cooking or pre-cooked protein (small chuncks of tofu, poached and shredded chicken, shrimp, and even white beans would work great)
  • 1-2 cups quick-cooking or pre-cooked vegetables, chopped (edamame, scallions, small broccoli/cauliflower florets, mushrooms, tomatoes, green beans, sprouts, cabbage, greens, or rehydrated random ingredients from Chinatown)
  • seasoning (see above)
  • 1-2 cups dry leftover noodles

Heat broth to a boil while you chop and assemble the rest of your ingredients.  Add protein and veg to simmering broth and cook 5 minutes or until heated through.  Add seasoning to taste.

When you're ready to consume: break up the noodle mass with your hands as much as possible and add to the broth.  Heat and stir until separated and resembling noodles, and serve immediately.

Wednesday, April 6, 2011

PATH Clam Chowder


On my way home from the city on the PATH train Saturday night, I found myself in a conversation about clam chowder nuances with an intoxicated Yankees fan.  Still not sure how it came to that, but the outcome was a realization that though I love clams and I love soup, I have never made clam chowder because I am used to traditional New England versions with recipes like this one which seems to defy the laws of volume by featuring more than 500 calories and and 30g fat per one-cup serving.

Manhattan clam chowder?  Kind of always seemed like a sacrilege in the vein of Canadian bacon and savory oatmeal (sorry Bittman, not on board).  But then I got to thinking about doing a lighter NE version, and maybe mixing it with the tomatoey NY soup to make something with the consistency of a light seafood stew but the flavor of pasta vodka.  I bounded out of bed on Sunday morning with clams on my mind, dead set on making this a reality.

Now, would this be better with fresh clams?  Probably.  But here is a visual aid for cost comparison purposes:


The "Worth it?" vector represents my enthusiasm to make a particular recipe.  The greater the distance above the "worth it?" vector a dish lies, the greater its perceived success will be once cost is taken into consideration.  You'll notice that up to the $10 mark, something can even rate poorly on objective deliciousness, however my perception will be extremely enjoyable since it cost so little.  Once the $15 mark is reached (my typical restaurant decision making price-point), the "worth it" vector rapidly plateaus.

One dozen fresh little-neck clams is approximately equivalent to one 6.5oz can for recipe substitution purposes, and Shop Rite prices rang in at $5.50/dozen versus the most excellent deal of three 6.5oz cans for $4.  So even if the fresh clams score an 8 in objective tastiness, a full point above their canned counterparts, the perceived tastiness of the canned clams is at least double.  Add to that the proportional effort of opening four cans versus steaming and shucking 48 clams and, well, there wasn't even a choice to be made here.

Right.  So now that's thoroughly justified, onto the soups.  Both of these are delicious on their own as well as mixed together, however the pink clumpy soup doesn't make for a super appetizing photo.  Serve these concurrently in a delicately swirled pattern and sell the combination as peace in the northeast.

At least with chowder - not baseball obviously.


PATH Clam Chowder
Cobbled together from Food Network, Martha Stewart, and Gourmet recipes and heavily adapted

If you made these at the same time, you can just drain the bacon grease from the first pot into the second and chop all the veggies at once.  It doesn't really take any more time than one or the other.

Manhattan Clam Chowder
Makes about 2.5L
Total time: 60 minutes (Active time 20)

  • 2 strips of bacon, chopped
  • 1/2 large onion, diced
  • 3 stalks celery, diced
  • 2 medium carrots, diced
  • 1 clove garlic, minced
  • 1 teaspoon dried oregano
  • 1 teaspoon dried basil
  • 1/4-1/2 teaspoon cayenne pepper (optional)
  • 1/4 cup (60 mL) white wine
  • 2 x 6.5 oz (185g) cans of chopped clams in juice
  • 28 oz can (800g) of whole tomatoes in juice
  • 1 large potato, scrubbed and diced (about 3/4lb/340g)
  • 1-2 cups (1/4-1/2L) low-sodium veggie or chicken stock
  • chopped parsley (optional)
  • salt and pepper

Spray a large pot with oil and add the bacon, spreading the bits out over medium heat.  Cook, stirring occasionally, until the bacon bits are crispy and the fat is rendered out, about 15 minutes.

Chop the vegetables while the bacon is cooking.  Remove bacon from the pot when it is crispy and set aside.  Drain all but 1 tablespoon of grease and add the onion, celery, and carrots and cook until starting to brown (5-7 minutes).

Add garlic, oregano, basil, cayenne (if using), and white wine.  Stir to scrape up any browned bits.  Add juice from the clam and tomato cans and add the tomatoes, breaking them up by hand.  Add the potatoes and enough stock to cover them.  Simmer on medium heat until potatoes are cooked (about 20 minutes).

When potatoes are tender, add clams, bacon bits, and parsley (if using) and stir to heat through.  Season to taste with salt and pepper.


Slightly Lighter New England Clam Chowder
Makes about 1.5L
Total time: 45 minutes (Active time 20)

  • 2 tablespoons bacon grease/butter/olive oil
  • 1/2 large onion, diced
  • 3 stalks celery, diced
  • 1/4 cup (30g) flour
  • 2 x 6.5 oz (185g) cans of chopped clams in juice
  • 2 cups (1/2L) milk
  • 2 bay leaves
  • 3 small potatoes, scrubbed and diced (a little over 1 lb/500g)
  • 1-2 cups (1/4-1/2L) low-sodium veggie or chicken stock
  • 1 tablespoon red wine vinegar
  • salt and pepper

Heat fat in a large pot and saute onions and celery over medium heat until softened, about 5-7 minutes. 

Sprinkle flour over onions and celery and stir until well-coated.  Add juice from the clams and milk and stir to combine.  Add the potatoes and enough stock to cover them, and simmer on medium heat until potatoes are cooked (about 20 minutes).

When potatoes are tender, add clams and vinegar and season to taste with salt and pepper.

Friday, March 18, 2011

10 Non-Financial Stock Tips

I've said it before and I'll say it again: soup is my favorite thing to make for mid-week lunches and dinners.  Soups optimize the healthy/filling/cheap/delicious quadrangle better than any of my other top lunch picks, as illustrated by this handy visual aid:


Most recipes call for some sort of flavored stock base, and while the store-bought liquid usually tastes great, it will typically run you about $2.99 per liter for the good stuff.  This can seriously add up if you're putting together a brothy soup and is an unreasonable expense if the rest of your ingredients are relatively cheap.  And the unhealthy-yet-still-tasty dry powder and cubes are usually loaded with questionable ingredients like MSG (even if it's labeled otherwise) and ungodly amounts of sodium.

The best way around this, of course, is to make your own stock.  And for the most part you can do this using your cooking trash.  I like to save the plastic bags from carrots or celery to add food scraps from normal day-to-day cooking, keeping the bags in the freezer when they're not in use.  When you have about two or three full bags, you can add the frozen scraps to a large pot, fill until covered with water, add seasonings, simmer for a few hours, and you're in business.  The more soup you make, the more scraps you'll have; it makes for quite a nice little self-perpetuating cycle.

But some scraps and seasonings are more equal than others when it comes to stock flavoring.  Here are some tips from my years of trial and error for creating the cheapest, most flavorful stock that requires the least amount of work and dishes:

1.  Good food scraps

  Meat bones are great (even buffalo wing remnants!) and are sold very cheaply at the butcher counter.  Good veg include onion peels, carrot ends and skin, celery ends and wilted pieces (including the leafy center), green parts and ends of leeks, spring onions, rinsed old mushrooms, stems of fresh herbs, the peel and knobby bits from fresh ginger, garlic, and the rinds of Parmesan or other hard cheese.

2.  Bad food scraps

 Squash and citrus peels are very bitter, all cruciferous vegetables taste rancid and smell like farts when you cook them for a long time, and anything with a high water content will completely disintegrate and discolor the stock (think spinach, lettuce, tomatoes, zucchini).

Most of these ingredients make for a great soup, but do not hold up well to long cooking.  Except the citrus peels of course.  Still not sure why I thought that was a good idea.


3.  Good seasonings

A couch surfing hippie once taught me that a splash of vinegar will really extract the maximum amount of flavor from your stock.  Actually I think he referred to magic collagen juju and not flavor specifically, but according to the internet, this isn't a completely baseless idea.

Whole spices will also add great flavor to the liquid (about 1/2-1 teaspoon of each will do); for maximum benefit, smash the spices using the flat side of a knife before adding them to the pot.  I always use black peppercorns, cloves (secret stock ingredient!), and bay leaves.  Dried chiles, cinnamon sticks, fennel seed, star anise, and coriander seed are also great additions. 

4.  Bad seasonings 

Ground spices and crumbled, dried herbs will add great flavor, but will also make your stock look dirty and give it a grittier texture since the small bits can't be filtered out unless you want to stuff around with multiple layers of cheesecloth or muslin and make a big mess.  Depending on the type of soup you want to make, this might not matter (eg. this would be fine for a thicker dark-colored soup).  I certainly agree with the Guardian: "personally, I reckon life's too short for consommés."

5.  The question of salt. 

I never add much salt to the stock itself, only to the dish I use it in, tasting as I go.  This is totally a personal preference, but I think it's much easier to control this way and you don't have to worry about the liquid over-reducing.  It's really easy to let sodium levels get completely out of hand when making soup, especially when using canned ingredients.  See Tip 10 regarding semantics and the non-necessity of preparing stock to be enjoyed on its own.

6.  Consider your end goal.  

I have made the mistake before of putting absolutely every scrap and seasoning I could find in the stock pot.  The result was something sort of bitter, sort of spicy with Asian flavors, and sort of cheesy.  Not recommended.  But some combinations that do make sense:

-All-purpose flavor base: Stick with the meat and onion/carrot/celery/leek/parsley scraps, and season with garlic, black peppercorns, whole cloves, and bay leaves.
-For a potato or cream-based soup: Add cheese rinds and fresh dill stems.
-For chili or other bean stew: Add dried chiles, coriander and cumin seeds, and fresh coriander and oregano stems.
-For braising meat: Add fennel seeds, star anise, fresh rosemary and thyme stems.
-For an Asian flavor base:  Add the hard unusable parts of lemongrass stems, dried chiles, fresh ginger peels, star anise, and fresh coriander stems.


7.  To brown or not to brown?

Some stock recipes suggest roasting or sautéing the vegetables and bones to brown them and generally develop a more complex flavor before adding water.  I'm definitely opposed to roasting on the basis that it creates another dirty dish (and cleaning roasting pans is the worst), and I'm also opposed to using fresh ingredients instead of scraps to make a broth.  Most soup recipes start off with sweating onions or some such anyway, why do it twice and why discard perfectly good vegetables?

Having tried it, I can say that the flavor difference is not measurable .  I am however intrigued by the easy-sounding German technique of slicing an onion in half and browning it before making stock.  Warrants experimentation. 

8.  Storage

The stock has to cool completely before refrigerating, so I will usually leave the covered pot out overnight to come to room temperature and strain and containerize in the morning (I've also forgotten and left veg stock out at room temperature for several days - still fine).  One-liter reused yogurt or clear takeaway containers are my favorite storage units and they conveniently hold the same amount as the cartons in the supermarket. 

I've never found a need for piddly plastic baggies or ice cube trays as recommended by some that expose the stock to the rest of your freezer's smells.  Need a quick defrost?  Microwave it for a minute to loosen the frozen cylinder and dump the rest into your soup pot.  The burner will do the work for you.

9.  Meat means more work.

Stock is a great use for your leftover carcasses from a Sunday roast, but the fattiness will add an extra step to the process since, unlike vegetable stock, you can't just strain the liquid and stick it in the freezer.  Return the strained liquid back to the pot and stick it in the refrigerator for a few hours to cool.  A white layer will solidify on the top that you can easily remove to de-fat the stock before freezing or using.  If you want to go really full circle, you can use the fat in any number of other delicious recipes.

10.  A note on semantics

The Kitchn does a great job at summing up the difference between broth and stock.  Basically broth is something that you can eat on its own with rich flavors, seasonings, and meat (not just the bones) while stock is more of a concentrated base on which to build a dish.  Many broth recipes call for fresh meats and veg which you cook to extract flavor and then discard, which, like the browned components in Tip 7, seems to me like a waste of perfectly good soup ingredients.  So use the bits you discard anyway to make stock, then add other ingredients and seasoning to finish the soup.  It's just plain efficient.


Want to give it a shot?  Here are some of my favorite stock-based recipes on the internet:

Carrot, Kumara, and Ginger Soup

Curried Split-Pea Soup

Super Delicious Zuppa Toscana

Hot and Sour Soup with Ginger

French Onion Soup

Wednesday, March 2, 2011

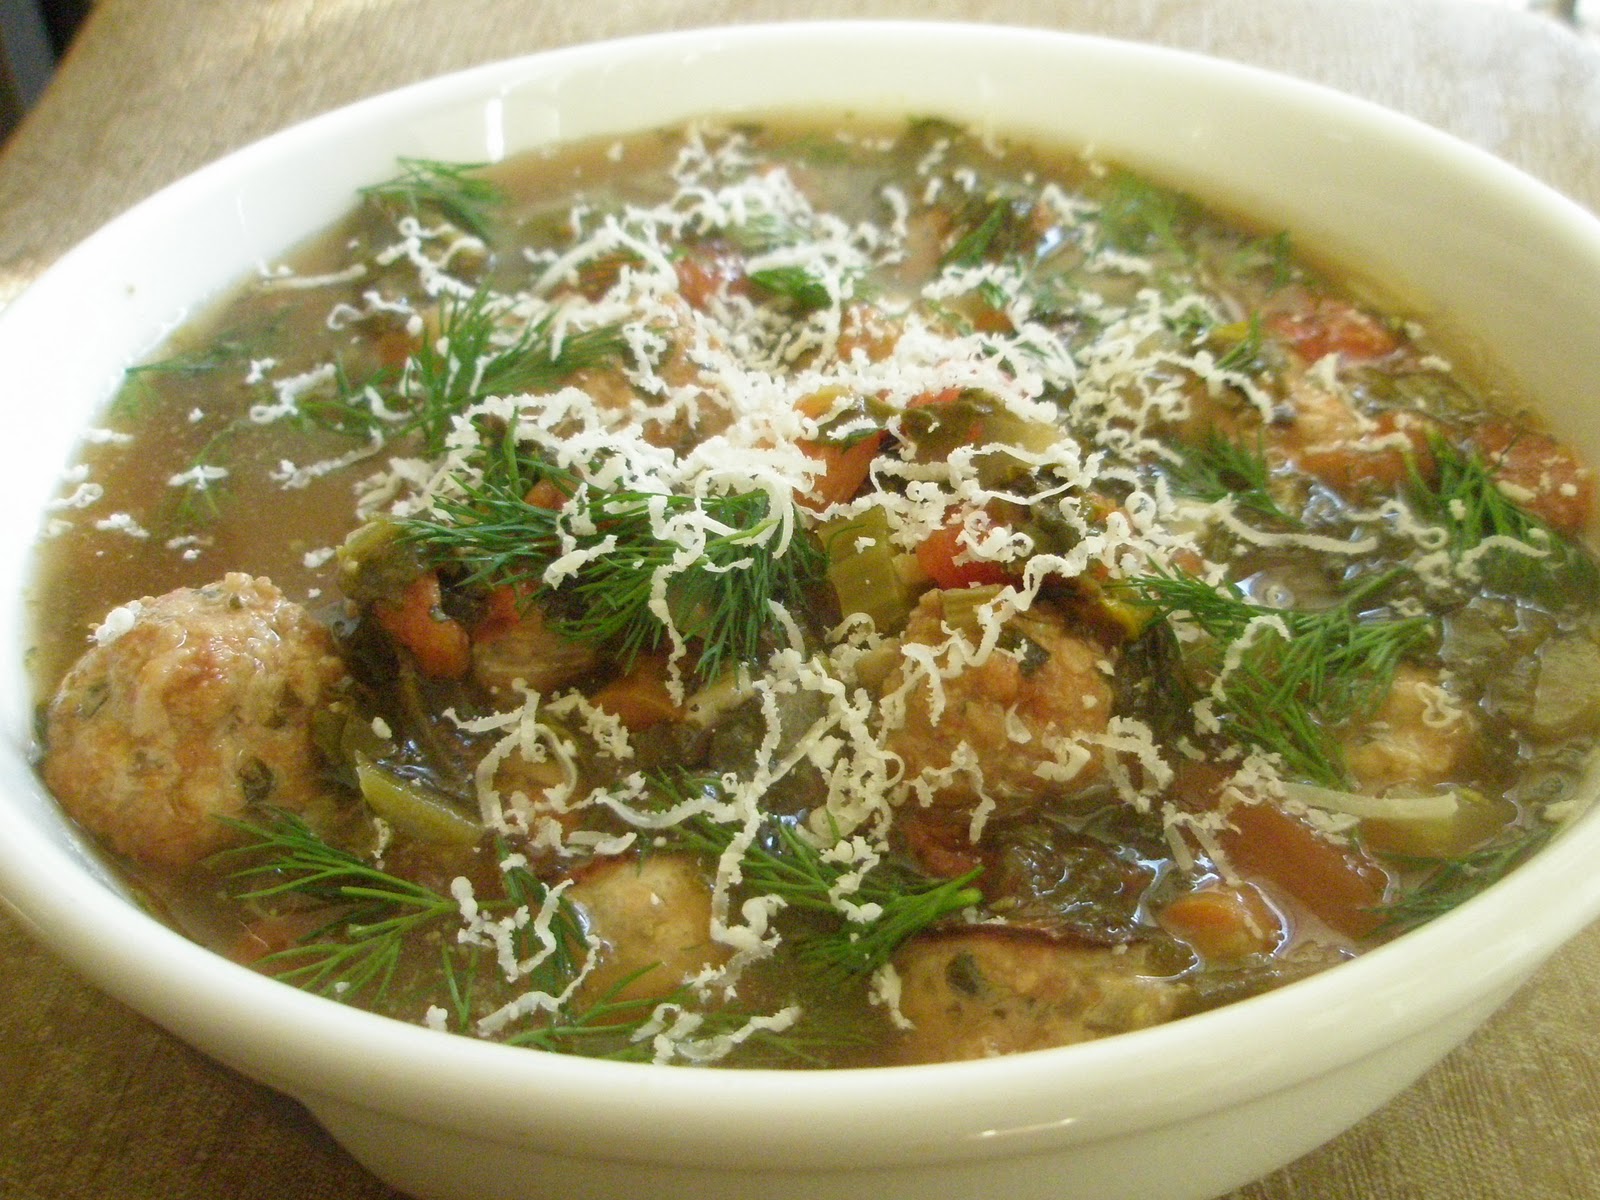
Marginally Healthier/Completely Bastardized Italian Wedding Soup


I've been having some serious meatball cravings lately, but the weather is giving me the nagging sense that beach season is not that far away after all.  And unfortunately, the ideal way to eat meatballs is soaked with a luscious, rich tomato sauce and nestled in spaghetti or a soft white roll, covered in cheese.

I tried to capture the most awesome flavorful qualities in the meatballs, but presented on a healthier platform of soup and made 100% with things I had in the freezer/pantry.  Italian wedding soup is the clear go-to for this type of dish, but most versions are too brothy, salty, or filled with overcooked gobs of tiny pasta.  I hemmed and hawed for awhile about adding another starch here, but by the time the meatballs were in the vegetable base, it was thick enough already (though I still want to try a version with lentils).

The most ironic part of this endeavor is that the recipe closest to what I wanted was Ina Garten's.  I had ground turkey on hand so had to tweak the meat and stock ingredients quite a bit to add more flavor, but I really liked the idea of baking the meatballs instead of frying.  It takes a lot less effort since you don't need to stand over the stove and also some of the fat bakes out so you're not left with an overly slick soup.

I also added some diced tomatoes in a last ditch effort to channel the meatball subs of my dreams.  This makes a great filling lunch and, if anything, is certainly a lot less messy to eat at work than a traditional Italian dinner.


Marginally Healthier Italian Wedding Soup
Adapted from Ina Garten

Serves 6-8
Total time: 1 hour (Active time 45 minutes)

  • 1.25 pounds (550g) lean ground turkey 
  • 2/3 cup bread crumbs
  • 2 cloves of garlic, grated
  • 1/2 small onion, finely diced
  • handful of parsley leaves, chopped
  • 1/2 cup (2 oz/50g) freshly grated hard cheese (I used pecorino romano)
  • 2 teaspoons dried sage (optional, thyme/basil/oregano would also be good)
  • 1 large egg beaten with a splash of milk
  • 1 tablespoon Worcestershire sauce
  • 1 teaspoon Dijon mustard
  • big pinch of salt, ground pepper

  • 1 tablespoon olive oil
  • 1 large onion, diced
  • 2 large carrots, diced
  • 3 stalks of celery, diced
  • 1 clove of garlic, grated
  • 1 bay leaf
  • 1 teaspoon dried basil
  • 1 teaspoon dried oregano
  • splash of white wine
  • 28 oz (800g) can of diced tomatoes in juice
  • 10 oz (280g) brick of frozen spinach, thawed in the microwave
  • 4 cups/1L vegetable broth (cubes are fine, but homemade is better)
  • 4-6 cups/1-1.5L water
  • fresh chopped dill, crushed red pepper, grated hard cheese (for serving)

Preheat oven to 350F/180C and line two baking sheets with parchment paper.  Add first set of ingredients in a large bowl and mix gently with your hands (or a spoon but this takes longer).  Form meat mixture into small balls about 1/2"/1cm in diameter (roundness is not crucial here); you should have about 60-70 total.  Bake for 15-20 minutes until lightly browned.

While meatballs are baking, heat olive oil in a large pot and saute onion, carrot, and celery until softened (about 5-7 minutes).  Add garlic, herbs, and a splash of white wine and cook for an additional minute or two while you get the liquid ingredients ready.  Add tomatoes and their juice, spinach, vegetable broth, and 4 cups/1L water and heat to a simmer.

Add meatballs when they are finished baking and heat through.  If too thick for your liking, add an additional 2 cups of water.  Taste and re-season if necessary with salt and pepper.  Serve with chopped dill, red pepper, and cheese, if using.

Tuesday, January 25, 2011

Basic Trash Lentil Soup


Lentil soup is for those days where you want something healthy and filling for dinner, tons of lunch leftovers, but don't want to stuff around with a trip to the store.  Brown lentils (or any kind really, but brown are typically cheapest) are a great pantry staple since they last forever and you are a straight-up fool if you pay more than $1.50 for a pound.

This recipe is infinitely adaptable and in The Trash Salad style is sort of half-based on the recipe on the package and half-based on things I had lying around.  The only unskippable minor ingredient is the vinegar or lemon juice which makes all the difference between a delicious soup and a bland pot of brown.  The acid makes the lentils have a satisfying meaty quality, which is really what you're aiming for when cooking vegetarian food (or in this case, vegetarianish).

Now, this soup is quick in the sense that it only takes maybe 10 minutes of chopping and throwing things in a pot followed by 30-45 minutes of beer-drinking downtime waiting for the lentils to simmer.  If you were clever and prone to planning ahead, you could cook them in advance and keep them in the fridge or freezer and then you'd be able to really make some magic.  Some recipes suggest that you rinse and pick through your lentils before cooking, but this is a massive waste of time.  In the interest of full disclosure, I have had a couple of pebble soup incidents over the years (only from bags, not the bulk bin lentils), but the ~5% chance of this happening does not outweigh the 15-20 minute time savings.

Tonight's version was a simple affair featuring bacon grease, smoked tofu, and spinach served with Franks hot sauce and a poached egg with a side of arrugula-based trash salad topped with sriracha mayo (oh, but more on that later).


Lentil Soup

Serves 6-8
Total time: 45 min-1 hour (Active time 10 minutes)
  • 1 1/2 tablespoons fat (bacon grease, butter, olive oil, whatever)
  • 1 onion, diced
  • 2 ribs celery, diced (OR the skinny core of the celery bunch, leaves included)
  • 2 skinny carrots, diced
  • 1 clove garlic, minced
  • 10 cups (2.5 L) water
  • 2 cups (or a 1lb bag) of brown lentils
  • 2 bay leaves (optional but I really like them)
  • Extra bits to add during cooking*
  • 2 tablespoons vinegar (any kind, or 3tbsp lemon juice)
  • salt to taste (start with 1/2 teaspoon)
  • Extra bits to add during the last few minutes of cooking**
  • Extra bits to add when serving***
Heat fat over medium heat in a large soup pot.  Saute onions (add first as you chop the rest), carrots, and celery for 5-10 minutes while you get your bits ready.  Add garlic and stir for another minute.

Add lentils, water, bay leaves, and your first lot of extra bits and stir.  Bring to a boil then cover and turn the heat to low.  Simmer for 30-45 minutes until lentils are as soft as you like.

Fish out your bay leaves (if using) and add vinegar, salt, and the second lot of extra bits and stir.  Taste, and reseason if desired.  Add more water if soup is too thick for your liking.

Serve with your third dose of extra bits.


Extra bits suggestions

*During cooking:  1-2 teaspoons dried herbs (oregano, basil, thyme), 1 teaspoon paprika, 1 tablespoon chili powder, 3-6 slices of diced cooked bacon or ham, half a block of tofu diced, 1 diced chipotle chili with 1 tsp adobo sauce, 2 tablespoons tomato paste (or ketchup in a pinch), 14 oz can of crushed tomatoes (you'll want to reduce the water if you do this), or substitute some or all of the water for broth or stock.  Extra winter veggies are also good, especially potatoes and butternut squash.

**Last few minutes of cooking:  fresh diced tomatoes, 1-2 cups of thinly sliced spinach or kale, frozen edamame, chopped fresh cilantro or basil

***Serving:  a poached egg, cooked rice, few tablespoons of greek yogurt or sour cream, salsa, garlicky croutons, flavorful crumbled or shredded cheese, hot sauce, chives, green onions, chili flakes, french fried onions, sliced avocado