Showing posts with label Bread. Show all posts

Wednesday, February 9, 2011

Trash Pizza

Clockwise from top left: avocado-mushroom-Sriracha, spinach-artichoke, red pepper-olive, and butternut squash-sage pizza

Friday pizza nights of my Trash Salad childhood were true genius, serving the dual purposes of temporarily pacifying my sister and my cravings for terrible food which we weren't ever allowed AND could also be used as a catch-all for random leftovers remaining at the end of the week.  My mom always made pizzas from scratch using frozen bread dough and while I love this idea, I'm not really blessed with the skills/patience required to stretch the tough pre-made dough out into perfect 16" thin crust circles.  This has resulted in some creative efforts on my part, like pizzas on a base of stale naan bread, tortillas, or rice cakes (not recommended for a toaster oven, fyi).

But!  I threw together a batch of from-scratch dough in under ten minutes over the weekend (using more or less the 101 Cookbooks recipe, a simplified riff on Peter Reinhart's Breadbaker's Apprentice) and don't think I'll be returning to quesa-pizzas anytime soon. 

Obviously the Kitchenaid mixer helped immensely, but it's really not that hard to knead dough for 5-7 minutes if you are less lazy.  Divide up dough, stick it in the fridge, leave for 1-3 days.  This step is the autolyse phase, or resting the dough so the flour can thoroughly hydrate and form strong and stretchable gluten proteins.  Take out of the fridge, leave for 2 hours on the counter, and you're in business.  The dough you create is super easy to instantly stretch out for topping.  Rolling pins and swearing not required.


Now, I am a thin-crust lover by trade.  If you prefer a more Chicago style variety (ick), I would recommend dividing the dough in the recipe into maybe 4 and not 6 sections and patting it straight onto a cookie sheet or whatever you're using because the more you lift the dough and get gravity involved, the more it will stretch the heck out of it.  You'll also have to bake thicker crust a lot longer to ensure it's cooked through, which can lead to burned toppings.

Some tips for making pizza dough from scratch:
    
  • From troubleshooting some of my own recipes, the biggest problem with the dough is usually too much flour.  This is especially a problem if you knead the dough by hand since it should be stickier than instinct would dictate (and dough stuck under your fingernails is more attention-grabbing than dough stuck to a dough hook).  So err on the side of caution and start with 3 1/2-4 cups of flour to 1 3/4 cups water, and keep your hands just lightly floured while kneading.  It's easy to add more flour in, but adding water to correct things isn't, especially if you're kneading by hand.
  • 
    Bash n' Chop
    Image via Amazon
  • Similarly, the dough will seem very sticky after you rest it on the counter before using.  Flour the counter and your hands well, then kind of form your dough pancake into a more manageable ball for transport.
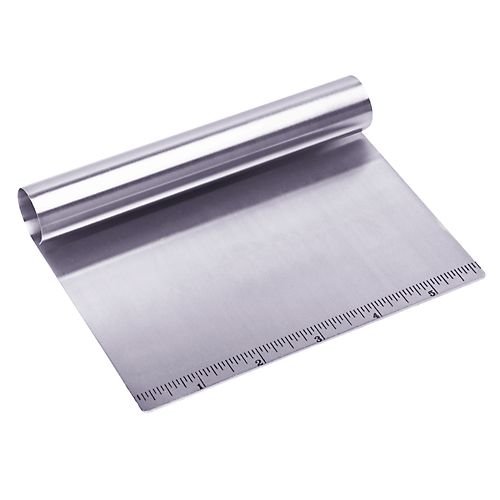
  • I recently purchased a Bash 'n Chop similar to this one from one of those school fundraiser order form things that seem to be the way of the future.  Very handy and works great as a dough cutter and maneuverer/pastry scraper/counter cleaner.  If you are guilted into spending money for someone else's kids, why not get something useful out of it instead of yet another tin of caramel corn?
  • When moving your bases from the counter to your baking surface, don't over-work the dough.  I.e. if you overstretched and ended up with holes, it's easier to patch it up than to attempt to roll out the whole thing again.
  • If your base is truly vakakta and needs reforming, let the dough rest and work on another section in the meantime.  The dough will loosen back up after 15 minutes or so and you won't have to resort to the awful rolling pin method.

And some awesome toppings of late:

  • 1/2 roasted butternut squash mashed with 1 teaspoon dried sage, sliced roasted red pepper and onion
  • 1/2 ripe avocado mashed with 1/4 cup red sauce, fresh mozzarella, sliced mushrooms and green onions, Sriracha drizzle
  • olive-oiled crust, fresh spinach, ricotta cheese, kalamata olives, artichoke hearts
  • old spaghetti sauce, fresh mozzarella, sliced green olives and roasted red pepper

Tuesday, February 1, 2011

Mom's Banana Bread with Almond Streusel


My mom is one of the tiniest people and healthiest eaters I know, so she was never one for random mid-week baking when I was growing up.  Unless of course, there were bananas that were going off in which case we'd be treated to banana bread for breakfast, second breakfast, and lunch (as long as it would ever last).  I don't even remember eating bananas as a kid, so I suspect this is the only reason that she bought them in the first place (correct me if I'm wrong here, Mom).

Overripe bananas beget delicious baked treats.  Not groundbreaking territory here.  But in the realm of banana bread recipes, Mom's is one of the best and lowest in fat out there.  I realize using shortening is a bit of a faux pas these days, but if you read your labels it's pretty easy to find a brand that is trans-fat free.  I've experimented a lot with this and shortening really seems to give the bread better structure (or a tender crumb, as they say) than butter does while using less of it.  Even better, the recipe as written is one-bowl and one-step.


To compensate for this relative healthiness and ease, I added a good sprinkle of an almond streusel on top.  The struesel is optional, but I wouldn't skip it.  What isn't made better with a streusel topping?  Nothing.  While I love nuts on banana bread, I'm fundamentally opposed to nuts in it, but if you like a banana nut bread, feel free to add 1/2 cup of chopped nuts to the mixed dough.


Mom's Banana Bread with Almond Streusel

Makes one 9" x 5" loaf
Total time:  60-70 minutes (Active time 10-15 minutes)

  • 2 tablespoons shortening
  • 1 cup white sugar
  • 1 egg
  • 1 teaspoon vanilla extract
  • 3 overripe mashed bananas
  • 1 teaspoon baking soda dissolved in 1/4 cup water
  • 2 cups flour (I like 1/2 all-purpose and 1/2 whole wheat)
  • 1 teaspoon cinnamon
  • 1/2 teaspoon salt

Combine ingredients in order listed (shortening and sugar should be well combined before adding other ingredients and do not over-mix).  Pour mixture into greased and floured loaf pan.

  • 1 tablespoon cold unsalted butter
  • 2 tablespoons flour
  • 2 tablespoons brown sugar
  • 1/4 teaspoon cinnamon
  • 1/8 teaspoon salt
  • 2 tablespoons chopped or slivered almonds
  • whole nutmeg (optional)

Preheat the oven to 350F. Combine first 5 ingredients with your hands until the mixture resembles chunky sand.  Add almonds and sprinkle mixture over the top of unbaked banana bread.  Grate whole nutmeg over the top, if using.

Bake loaf at 350F for 45-60 minutes until a tester pulls out clean.  Cool for at least 15-20 minutes in the pan before cutting.

Friday, January 14, 2011

Ciabatta

Yeast breads scare me, what with their finicky temperature sensitivities and climate water/flour ratio adaptations.  They also take forever to finish, require tons of gluteny counter cleanup, and lots of muscle for kneading, so I generally don't think these breads are worth the time and effort considering you can get a delicious, day-old, pre-sliced loaf for less than $2. 

But having said all that, some recent kitchen gadget acquisitions have inspired me to experiment more.  If you've got a lazy weekend ahead of you, this recipe for ciabatta from the New York Times Baker's Apprentice blog is really not labor intensive in the slightest, though it does require lots of rising time and makes the counter into a doughy mess.  The awesome smell coming out of your oven should make the cleanup process just a bit more pleasant.


The recipe recommends using a heated pizza stone to bake these, but lacking this I improvised using parchment paper and the back of a cookie sheet.  Next time I will either use a jelly roll pan, or stagger the baking since my attempt to fit three loaves on the back of a regular sized pan led to some sad looking ends where the dough drooped off the sides.  Or bite the bullet and buy a pizza stone since the loaf bottoms were really not as dark and delicious as the tops.

I also reduced the salt and the amount of cornmeal base mixture (I was scraping it off the bottom of the finished loaves), and simplified the directions a bit.  The loaf that didn't fit on the first go in the oven seemed to have the best rise and overall flavor, so I would steer towards the high end of the time estimates.  For my next trick, I want to try subbing in whole wheat flour and some seeds for texture, though I almost don't want to tempt fate since the bread turned out so fantastic this time around.

Ciabatta
Adapted from The Baker's Apprentice

Makes 4 small loaves (3-4 x 8 inches)
Total time: 4-5 1/2 hours (Active time less than an hour)
  • 1 1/2 teaspoons active dry yeast
  • 1 3/4 oz hot to the touch water (3.5 tablespoons at 100-115F, or about as hot as the tap will go but short of burning your finger)
  • 16 oz unbleached bread flour (about 3 1/4 cups)
  • 13 oz room temperature water (1 1/2 cups plus 2 tablespoons)
  • 1 1/2 teaspoons iodized salt
  • olive oil (for coating the bowl)
  • cornmeal (for sprinkling on your base before baking)
Sprinkle the yeast on top of the 1 3/4 ounces of hot water in a small bowl to let it dissolve, and set aside.

Add the salt to the bread flour in a large bowl and stir to incorporate. Make a well in the center of the flour/salt mixture, and add the cool water little by little.

Give the yeast mixture a stir to ensure it has dissolved in the warm water, then add it to the large bowl.  Stir everything until just mixed, then stop and let it sit for 30 minutes covered in plastic wrap (you can save this for repeated use).

After 30 minutes, sprinkle flour on your work surface, then scrape the dough out onto it.  Flour your hands and form the dough into a rectangle.  Fold one of the short edges to just beyond the center, then fold the other side over the center to make another rectangle.  Fold the other two sides of the dough over the center the same way, then turn it over and dust off the flour. Place the folded dough in a a bowl slicked with olive oil (about a tablespoon) and let it sit for 30 minutes, again, covered with plastic wrap.

After 30 minutes, turn out your dough on a floured work surface and fold again, using the same method as above.  Place the dough back in the oiled bowl (make sure it doesn't have any dough residue from the last time), covered with plastic, and let it rise until it has doubled in volume, 1 to 2 hours.

After the dough has doubled in volume, sprinkle a little more flour onto your workspace.  Scrape the dough out onto the counter, flour your hands, and gently flatten the dough into a large, even rectangle.  Use a bench scraper or a knife to cut the dough into 4 equal pieces.  Fold the sides of each piece over the center in the same manner as above.  Place each folded piece seam-side down on the floured counter. Cover with oiled plastic wrap and let it rise for 30 to 60 minutes, or until the dough has doubled in volume.

Preheat your oven to 475F and put a baking stone on the middle rack (if using) and an empty pan for water on the bottom rack.  Take one ciabatta piece at a time and stretch it very gently to lengthen.  Sprinkle 1-2 tablespoons of a mixture of half cornmeal and half flour on a piece of parchment paper.  Turn each stretched ciabatta piece upside-down and place on the cornmeal covered paper (you may have to bake in two batches if the loaves won't fit on one surface).  Reform the loaves very gently if they get warped in the transfer.

Transfer the parchment paper to the preheated stone or the back of a baking sheet and place on the middle rack of the oven.  Pour water into the pan on the bottom rack in order to make steam and close the oven door.

Bake until loaves are a very dark brown, approximately 20-30 minutes. Let the bread cool completely before cutting into it.